Articles by "Beauty tips"
Showing posts with label Beauty tips. Show all posts
Made from the castor seed, castor oil is high in triglycerides and ricinoleic acid. These two items make it a potent medicinal oil that can be used both internally and externally. For some, having castor oil is the cure-all to their ailments.
If You’re Not Using Castor Oil, You’re Missing Out. Here Are 7 Things You Need To Know
Credit:healthyskymag.com
Castor oil is considered to be pretty unique because ricinoleic acid is not found in many other substances, and it’s such a dense, concentrated source. It is produced by cold-pressing the seeds and subsequent clarification of the oil by heat.
Aside from its primary constituent, ricinoleic acid, castor oil also contains certain beneficial salts and esters that function primarily as skin-conditioning agents. At the same time, they help stabilize the texture and consistency of products, which is why castor oil is used in so many cosmetics, hair, and skin-care treatments.


Throughout history, castor oil’s most popular use has been for treating skin, digestion, and hair conditions. Check out the 7 things that castor oil can do for you and you may decide to become a faithful user of this vegetable oil.

1. Constipation

Castor oil acts as a laxative. According to researchers, the main fatty acid in castor oil, ricinoleic acid binds to receptors on the muscle cells of your intestinal walls. This causes those muscles to contract and push out stool and thus, relieves constipation.
Castor oil works effectively and quickly when taken during the day. Have a 15 ml dose of the oil once a day. Since it has a very strong taste, some suggested chilling it a bit before consuming or mixing it with orange juice, in order to mask the flavor.

2. Relieve dry, itchy skin

Castor oil helps in relieving dry and itchy skin. It also makes a great skin moisturizer, anti-inflammatory blemish treatment, and can delay the signs of aging like wrinkles since it helps increase collagen and elastin production.
The ricinoleic acid found in castor oil also makes it a great natural home remedy for fighting mild acne. As it penetrates deep into the skin, it fights bacteria overgrowth that can clog pores, while softening and hydrating irritated skin at the same time.
Combine 3/4 cup shea butter, 4 tablespoons castor oil and 5 to 10 drops of lavender oil, Roman chamomile or carrot seed oil. Whip the shea butter and oil together to get the consistency you want. Add your essential oil and mix some more. Pack it into jars and use freely.

3. Add shine and growth to hair

Using castor oil can help your hair grow faster, thicker, stronger, shinier and free of dandruff. Besides the fact that castor oil has omega-6 fatty acids to make hair shine, it goes to the root of the problem and improves circulation.
Massage slightly warmed-up castor oil into your hair and scalp, and it will improve the blood circulation to your follicles, which speeds up hair growth.
Also, you can make a hair mask from 1 tablespoon castor oil, 1 tablespoon olive oil and juice from 1/2 lemon. Massage this through the hair to the tips and letting it sit for 30 minutes before washing and styling your hair. This hair mask also has antifungal and antibacterial properties that can help clear up dandruff and scalp infections.

4. Treat fungus

Castor works well as a toenail fungus treatment. For the same reason, it helps fight acne, castor oil can get rid of persistent fungal infections, moles, and cysts. Traditionally, the method used was to apply a small amount of castor oil with a pinch of baking soda to the infected area.
When ingested, castor oil also works internally to balance gut bacteria and reduce lingering toxins, yeast or molds that can cause fungus to develop in the first place.

5. Reduce pain in joints

Castor oil is often used a natural treatment for arthritis pain, joint swelling, and inflammation. It has natural anti-inflammatory properties that make it an ideal massage oil that can be applied to aching joints, muscles or tissue.
Try massaging painful areas with castor oil followed by a hot water pack to increase absorption and drainage. Practicing this process twice weekly can give you the most pain-reducing results.

6. Helps balance hormones and improve libido

Enhancing the absorption of fat molecules within the digestive tract is essential for the formation of healthy hormones. That’s what makes castor oil consumption a way to balance hormones naturally. Also with less floating toxins present within and around cells, coupled with better blood flow, sex organ function works more efficiently and people experience less PMS symptoms, fatigue, mood swings and depression.

7. Improves immune function

Castor oil is believed to improve lymphatic drainage, blood flow, thymus gland health and other immune system functions. Research has shown that patients who use abdominal castor oil packs have significant increases in the production of lymphocytes. Lymphocytes are the immune system’s natural “disease-fighters” that attack outside invaders such as toxins, bacteria, and other perceived threats.
Castor oil has some great medicinal properties. Be aware that some people may be allergic to the oil, so test it on a small area before going crazy with it.
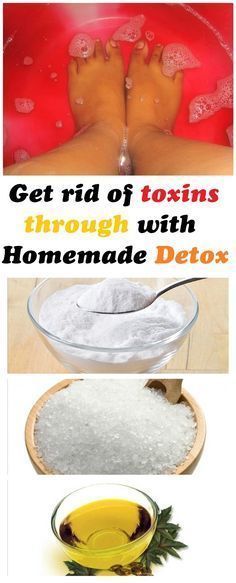
The feet are related to internal organs. The points on the soles have a link corresponding to a specific part of the body. Eliminate toxins from the body not only by giving up certain foods. 
Get rid of toxins through with Homemade Detox
Credit:beautyoftheskin.com
Whatever measures you take, you can not really stay away from toxins. To stay healthy, you need to do regularly, detoxification cures that will help strengthen your immune system. Because often wearing shoes, these points are rarely stimulated. You can open these pathways and help to purify the internal organs. To stay healthy, you need to do, regular detoxification cures that will help you strengthen and immune system. Eliminate toxins from the body not only by giving up certain foods. Baking soda is part of acid salts, and his name is considered a common name for use in household and other chores in the kitchen or the house. 


This food ingredient that you can find in almost any home can be appreciated like salt, not only because of its health qualities, but also for other household activities. From cakes, cakes, creams for healthy skin and to clean objects, baking soda really made a career not only in the kitchen.  Learn how you can get rid of harmful substances from the body through the feet.
Treatment with baking soda, salt, castor oil and water
Ingredients :
-2 tablespoons of baking soda
-2 tablespoons of Epsom salt
-10 drops of castor oil
– 5-6 liters of water
Bring the water in a bowl, mix the ingredients well and will keep the feet in this mixture for 20 -30 minutes. On completion process will they legs wrapped in a thick blanket. This process helps to clean thoroughly the body, stimulates circulation. Castor oil is a yellow liquid, viscous, which is extracted from the seeds of castor oil. Its miraculous effects on the human body were discovered and successfully used centuries ago. It is an oil with a high concentration of unsaturated fatty acids and exhibits strong antioxidant and anti-inflammatory properties.
Rules of using sodium bicarbonate
1. Pregnant and lactating women, children aged up to five years, people suffering from hypertension or have a salt-free diet soda should use only external.
2. Keep baking in a closed container away from moisture and reach of small children.
3. Avoid to use it, especially internally, more than three days, and if symptoms persist or worsen, give him to take and consult a doctor.
Pimples are nasty no matter how you look at them, and the blackheads and whiteheads that collect around your nose can be absolutely infuriating. Figuring out how to get rid of existing whiteheads and blackheads is bad enough, but once you get rid of them, they insist upon returning.
Get Rid Of The Blackheads & Whiteheads On Your Nose & Face & These 10 Tricks!!!
Credit:waytosteelhealthy.com
You don’t have to throw your hands up in defeat. Listed below are 10 simple ways you can help remove and prevent whiteheads and blackheads around your nose naturally. Say goodbye to frustration and hello to a clear face. The first six are Jennifer Chiu’s nose cleaning regimen, which can be seen on YouTube.

1. Steam. 

  • Chiu starts the process with a hot towel to open the pores and loosen the dirt.

2. Dr. Hauscha toner. 

  • She then applies the toner to her skin to help remove any oil and tighten the skin.


3. Flossers. 

  • With two personal flossers, Chiu proceeds to squeeze, scrape and pick as many whiteheads and blackheads off her nose as she can.

4. Bioré pore strips. 

  • Chiu uses the deep cleansing pore strips after scraping her nose.
  • She recommends making sure that the strip is really wet in order to get good adhesion to the blackheads still in the pores.
  • After 10 minutes, pull off the strip, removing blackheads that are stuck to it.

5. Mask. 

  • Chiu uses BareMineral’s Dirty Detox mask for this step.

6. Tea tree oil. 

  • Once she finishes her regime, she dabs diluted tea tree oil on her nose, taking advantage of its antibacterial properties.

7. Baking soda. 

  • Exfoliating is also important for preventing blackheads and whiteheads. 
  • Reader’s Digest recommends a baking soda paste for both exfoliating and balancing the skin’s pH.
  • Mix 2 tbsp. baking soda and 2 tbsp. water, creating the paste, and then use it to cleanse your skin.

8. Sugar Scrub. 

  • Another great homemade exfoliant is a sugar scrub.
  • Reader’s Digest uses brown sugar, honey, and lemon, but Doctor’s Health Press makes it is with regular sugar, honey, and lemon.
  • Mix equal parts sugar and honey and a few drops of lemon juice to create this scrub.
  • After using it, wash your face with a regular cleanser to get rid of any stickiness that’s left behind.

9. Tumeric. 

  • By mixing turmeric with coconut oil and water, you can create a paste to treat your nose that puts tumeric’s antifungal, antibacterial and anti-inflammatory properties to use.
  • Reader’s Digest recommends using Kasturi turmeric, as regular turmeric will stain the skin.

10. Lemon juice. 

  • Specific for treating whiteheads, lemon juice helps remove facial oil and exfoliates. Doctor’s Health Press recommends dipping a cotton ball in the lemon juice and dabbing it on your face. Let it sit up to 20 minutes and then wash it off.
  • No longer do whiteheads and blackheads have to be an embarrassment. You can get rid of what’s there and prevent more from appearing with things that you probably already have around the house. Hello, healthy skin!
Aloe vera is well-known for its medicinal properties and as an ingredient in most of the beauty products.So if you want to have the soft and glowing skin you don`t need to spend money on expensive cosmetics products, all you need is to try this simple trick, and you will get beautiful skin like never before.
She Rubs Aloe Vera, On Her Face. What Happens, After 15 Minutes Will Surprise You!!!!
Credit:waytosteelhealthy.com
This method is very simple and easy, you need only one ingredient (aloe vera) and you will be amazed by the results!
This is what you should do:

1. Wash Thoroughly

  • Without peeling the plant, wash it thoroughly with water.
  • Use clear water for washing as the leaf may be dirty.

2. Soften it

  • You may soften the leaf just by thumping gently on it.
  • You can even use a roller for this purpose.


3. Cut it into two

  • After you soften the leaf, you should cut it into two.
  • Don’t cut a very large portion as you can use the other half for the next time.
  • So you should only the right amount that you want to use.

4. Cut the edges

  • To peel the leaf you first need to cut the edges of it using a knife.
  • Cut the edges from both the sides, making the leaf open and easy to be peeled.

5. Slit it into two

  • As the edges are cut, you should slit open the leaf using your hands.
  • If it doesn’t open easily, you can also use a knife to slit through its center.

6. Scrape out the juice

  • Using a spoon you can take out the juice from the leaf.
  • Take out as much juice as you can so that nothing goes wasted.
  • Then, you should collect it in a container.

7. Rub all over your face

  • Using your fingers you should apply the aloe vera juice all over your face.
  • You can even use the same leaf to rub the mask throughout the face.
  • Leave the mask to dry for about 15-20 minutes.

8. Wash your face

  • After the mask is dry, you can try to peel it off from your face.
  • Then wash your face with clean water.
  • Don’t use soap or any chemical for washing as it will defeat the purpose of using this remedy.

9. Flawless Glowing Skin

  • Use a clean towel to dry your face.
  • You will love the supple and glowing skin that you will get after washing your face.
  • You will be more than surprised by the results!
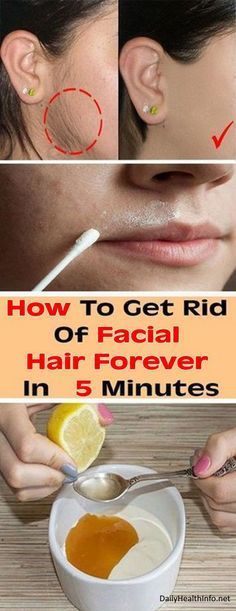
You wake up in the morning, stretch your body out while still in your warm bed, then make your way into the bathroom, only to find that the hair you plucked from your chin yesterday is back, and longer than ever.
Remove Facial Hair Once and For All With This Natural Remedy
Credit:dailyhealthinfo.net
Unwanted hair is inevitably going to grow in unwanted places. And, depending on what kind of face you prefer to present to the world, these can be a huge problem. Unwanted facial hair can become an embarrassing beauty concern for women, specially when they age and their estrogen levels change due to menopause.
The hair removal process can be tedious and painful, but by applying these natural DIY turmeric hair removal remedy, it does not have to be!

DIY Hair Removal With Baking Soda and Turmeric in 5 Min, Naturally and Permanently At Home:


Constituents:
  • 2 teaspoons of baking soda
  • 1 teaspoon of organic turmeric powder
  • Water to combine
Instructions:
  1. In a small bowl, combine baking soda and turmeric
  2. Add a small amount of water to combine the ingredients. There should be enough water that the mixture becomes a paste
  3. Apply directly to areas that you wish to remove the hair
  4. Allow the mixture to dry on your skin
  5. When the mixture is dry, rub it off of the skin using your fingers
  6. Complete the procedure by washing your face with your favorite face wash in order to remove the turmeric color, and apply moisturizer

Notes:

Don’t use on dry or sensitive skin, as it can tend to dry out the skin.
Don’t use processed turmeric, as this can tend to stain. Instead, focus on using organic turmeric powder in this remedy.
To remove the yellow coloration on your skin left behind after the application of turmeric, dip a cotton ball in milk and rub it on your skin.
We recommend these Feel Good Organics Turmeric Powder that is 100% raw and harvested from turmeric plants in India.
Brown spots or as the people also know them – liver spots and age spots appear as flat and brown or dark spots on the skin. They can be different in size. They mostly appear on the hands, shoulders, face, and arms because these areas are the most which are exposed to sunlight.
You Only Need One Ingredient To Remove Brown Spots! This Is Amazing!!!
Credit:admirablebuilding.org
The appearance of these spots is mostly seen in people over 50, but young adults can also have them if they didn’t pay attention to the time they spent exposed on the sun.

What Causes Age Spots?

As we have said this previously, they mostly appear because of a greater exposure on the sun. They can also appear if you use tanning beds frequently. The pigment that gives our skin its color is called melanin. It is located in our upper skin layer.
When ultraviolet lights touch our skin, the production of melanin becomes faster and creates a kind of a tan that should protect our deeper skin layers not to be damaged by the UV rays.
The areas which were the most exposed will probably be covered with liver spots because this pigment is produced in great amounts.


You need to protect your skin from the sun so that you can defend yourselves from these spots.
Anyone can have these spots, but they mostly appear in people who have light-colored skin and the ones who are exposed to sunburns frequently.
Still, these brown spots aren’t dangerous. In case you notice they change their appearance or shape, you should visit a specialist, because they may be an indicator for melanoma. Here are some of the changes you should pay attention to:
  • Irregular border
  • Dark pigment
  • Accompanied by redness, tenderness, bleeding or itching
  • Increases in size rapidly
  • Unusual color combination

Age Spots Home Remedy

  • You can treat age spots with bleaching creams, laser therapy, dermabrasion and chemical peels. Here, we’re going to offer you something natural.
  • The recipe is recommended by Dr. Doug Willen, author of “Quantum Paleo”. It’s a combination of 2 natural ingredients: onion juice and apple cider vinegar. Onions are full of antioxidant compounds that can help you eliminate all of the free radicals from your body.
  • Apple cider vinegar contains alpha hydroxy acids that are able to remove the dead skin cells and help you have healthy skin underneath. Many people have used it and it guarantees amazing results. It will make your skin glow naturally.

Preparation Method

  1. Take 1 fresh onion. Dice it well and then use a mortar and a pestle to pulverize it.
  2. When it becomes liquefied, combine it with the apple cider vinegar in a blender.
  3. Blend it well to obtain a homogenous mixture.
  4. Put it in the areas where you have liver spots with the help of a cotton ball.
  5. Make sure the apple cider vinegar you’re going to use is unfiltered and organic.
  6. Don’t forget to apply sunscreen
More and more people are convinced of the benefits of sodium bicarbonate, so they got to use it frequently in everyday life, either for cooking, cleaning or as a beauty product. 

How To Use Baking Soda To Reduce Dark Circles And Bags Under The Eyes
Credit:healthytipsremedies.blogspot.com
Especially women appreciate it as a beauty product.
The most effective face masks contain sodium bicarbonate. The recipe below helps eliminate dark circles and bags under the eyes.
Method:
1. Add a teaspoon of baking in a glass of hot water or tea and mix well.
2. Soak two cotton pads in this solution and place them under the eyes.
3. Leave on for 10-15 minutes, then rinse your face and apply a moisturizer.
Do this daily and you’ll see amazing results in just 2 weeks!
If you have problems with wrinkles and sagging facial skin, do not worry. In the following text we will present you amazing homemade natural cleanser that will put an end to your problems.
This Is How To Use Coconut Oil And Baking Soda To Look 10 Years Younger
Credit:americafolks.com
In this article, we will show you a recipe for an incredible natural face cleanser that will provide deep cleansing of the pores and aid your efforts to remove acne and blackheads.

In addition, this natural combo will help you get rid of dead skin cells, eliminate excess dirt and dust and remove acne, scars, and redness.

This natural face cleanser combines two amazingly effective natural ingredients – coconut oil and baking soda.
As we all know, baking soda is a very strong, versatile ingredient that is utilized in many different ways. For instance, people use baking soda to prepare different baked goods, as well as when performing household chores. Baking soda comes in handy when you are in need of a natural polishing or deodorizing product.


In addition, some of them use baking soda as a cleaning product, as a replacement for toxic and harmful commercial cleaners.

COCONUT OIL AND BAKING SODA FACE MASK

Ingredients

2 teaspoons of extra virgin coconut oil
A teaspoon of baking soda

PREPARATION

Mix the ingredients in a bowl until they form a paste. Apply it on the affected area, rubbing slowly.

Leave the mask on for 5 minutes and then rinse your face with warm water. You can apply a gentle massage after treatment.

You do not need to apply a moisturizer after the procedure because coconut oil will hydrate your skin perfectly.

If you enjoyed this post, I’d be very grateful if you’d help it spread by emailing it to a friend, or sharing it on Pinterest. Thank you!